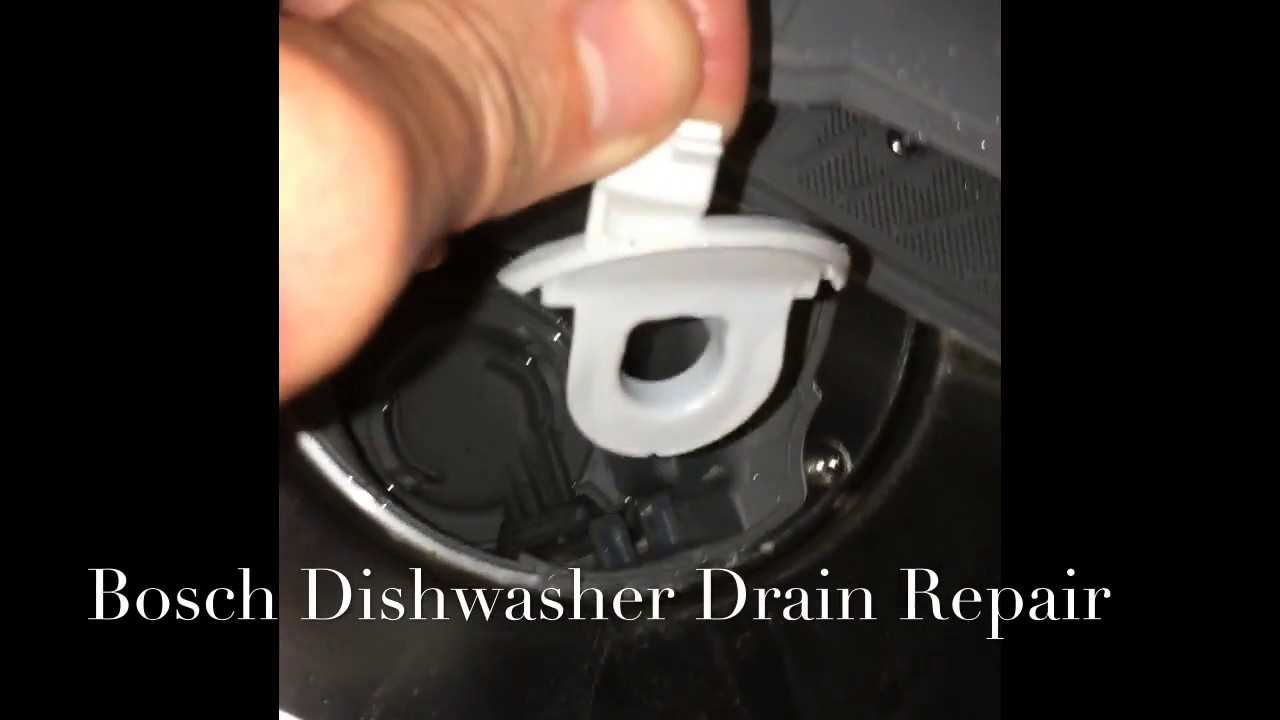
When your kitchen device encounters issues, it can disrupt your daily routine and create unnecessary stress. Understanding how to address common problems is vital for maintaining efficiency and extending the lifespan of your equipment. This section will equip you with the knowledge to identify typical malfunctions and implement effective solutions.
In this guide, you will discover step-by-step instructions tailored for various situations, helping you navigate through complications with confidence. Whether it’s unexpected noises, poor performance, or error codes, you’ll find insights that are both practical and easy to follow.
By mastering these techniques, you empower yourself to take control of your household tasks and ensure your equipment runs smoothly. Let’s delve into the essentials that will aid you in resolving issues quickly and effectively.
Bosch Dishwasher Overview
This section provides an insightful look into a renowned kitchen appliance known for its efficiency and reliability. Designed to enhance the dishwashing experience, it combines advanced technology with user-friendly features, making it a staple in modern households.
Key Features
- Energy efficiency that minimizes consumption
- Quiet operation for a peaceful environment
- Multiple washing cycles tailored for different needs
- Adjustable racks for optimal space management
- Smart technology for remote monitoring and control
Common Advantages
- Time-saving: Reduces the manual effort required for cleaning
- Consistent performance: Ensures thorough cleaning every time
- Durability: Built to withstand regular use over the years
- Stylish design: Complements various kitchen aesthetics
- Environmentally friendly: Designed to use less water and energy
Common Issues with Bosch Dishwashers
Appliances designed for cleaning utensils can encounter a range of problems that disrupt their functionality. Understanding these typical issues is essential for effective troubleshooting and maintenance. Users often report various concerns, from inefficiencies in cleaning to unusual noises during operation.
1. Insufficient Cleaning
One prevalent issue is the inability to thoroughly clean items. This can be caused by clogged filters, blocked spray arms, or improper loading techniques. Ensuring that the filters are regularly cleaned and the spray arms are unobstructed can greatly enhance performance.
2. Leakage Problems
Water accumulation around the base of the unit often signals a leakage issue. Common culprits include worn door seals or loose hoses. Inspecting seals for wear and ensuring connections are tight can help prevent leaks.
3. Unusual Noises
Strange sounds during operation, such as grinding or rattling, can indicate loose components or foreign objects trapped in the mechanism. Regularly checking for obstructions and securing any loose parts can mitigate these disturbances.
4. Error Codes
Modern machines often display error codes that provide insight into specific malfunctions. Referencing the user guide can clarify the meaning of these codes, helping users identify and address the underlying issues.
5. Poor Drying Performance
If utensils are consistently left wet after a cycle, it may be due to a malfunctioning heating element or improper drying settings. Ensuring that the drying settings are correctly configured and inspecting the heating element can improve drying efficiency.
By being aware of these common challenges, users can take proactive steps to maintain their cleaning appliances and ensure they operate smoothly.
Troubleshooting Basic Problems
When appliances encounter issues, it’s essential to identify and resolve them effectively. Common malfunctions can often be addressed with straightforward steps, helping to restore functionality without the need for professional assistance. This section outlines frequent challenges and their potential solutions.
Common Issues and Solutions
- No Power:
- Check if the unit is plugged in properly.
- Inspect the circuit breaker for any tripped switches.
- Ensure that the outlet is functioning by testing with another device.
- Poor Cleaning Performance:
- Verify that the spray arms are not blocked or obstructed.
- Examine the filter for debris and clean if necessary.
- Make sure the correct detergent is being used and in adequate amounts.
- Unusual Noises:
- Listen for any loose items that may have fallen into the appliance.
- Check if the spray arms are moving freely.
- Inspect for worn or damaged components that may need replacement.
Additional Tips
- Always refer to the user guide for specific troubleshooting steps.
- Regular maintenance can prevent many common issues.
- Consider reaching out to customer support for complex problems that remain unresolved.
Step-by-Step Repair Procedures
This section provides a comprehensive guide to addressing common issues that may arise with your kitchen appliance. By following these systematic steps, you can effectively troubleshoot and resolve problems, ensuring optimal functionality.
-
Identify the Issue:
- Observe any unusual sounds or error codes.
- Check for leaks or signs of malfunction.
- Review the user guide for common problems.
-
Gather Necessary Tools:
- Screwdriver set (flathead and Phillips).
- Multimeter for electrical testing.
- Cleaning supplies for maintenance.
-
Access the Components:
- Unplug the appliance for safety.
- Remove the front panel or access door.
- Locate the specific part that needs attention.
-
Perform the Necessary Actions:
- Replace any faulty components as needed.
- Clean filters and check for blockages.
- Tighten loose connections to ensure proper function.
-
Reassemble and Test:
- Carefully reattach any removed panels.
- Plug the appliance back in and run a test cycle.
- Monitor for any recurring issues or abnormal behavior.
Following these outlined steps will assist in maintaining the performance of your kitchen equipment, allowing you to enjoy its features without interruption.
Tools Needed for Repairs
Ensuring the efficient functioning of household appliances often requires specific equipment. Having the right instruments on hand can significantly simplify the process, allowing for effective troubleshooting and resolution of issues. Whether it’s tightening screws, checking electrical components, or replacing parts, a well-prepared toolkit is essential.
Commonly, a basic set will include a screwdriver set, pliers, and a wrench. Additionally, a multimeter can be invaluable for diagnosing electrical problems. For more extensive tasks, consider having a replacement parts kit, which may include seals, filters, or hoses, depending on the situation. Always prioritize safety by having protective gloves and goggles nearby.
Being equipped with these tools not only facilitates the process but also enhances confidence in handling various challenges that may arise during maintenance. By organizing your toolkit effectively, you can ensure a smoother experience when addressing appliance concerns.
Understanding Error Codes
Error codes serve as vital indicators, helping users diagnose issues with their appliances. These codes provide a streamlined way to identify malfunctions and facilitate timely resolutions. Recognizing the meaning behind each code can significantly enhance troubleshooting efficiency.
Common error signals can vary widely in their implications. Understanding these messages is essential for effective maintenance. Here are some frequent categories of codes you might encounter:
- Electrical Issues: Codes in this group often point to problems with power supply or wiring.
- Water Flow Problems: Indications of blockages or inadequate water levels may arise in this category.
- Heating Failures: These codes highlight issues related to the heating element or temperature sensors.
- Drainage Complications: Signals that suggest clogs or pump malfunctions fall under this classification.
To effectively interpret these codes, consult the specific reference guide associated with your appliance model. Doing so will ensure you have accurate information to tackle the identified issues.
Maintenance Tips for Longevity
Ensuring the prolonged functionality of your appliance requires consistent care and attention. By implementing a few straightforward practices, you can enhance its performance and extend its lifespan.
- Regularly clean filters to prevent clogs and maintain efficiency.
- Check and replace seals and gaskets to avoid leaks.
- Run maintenance cycles using appropriate cleaning agents to eliminate residue.
- Avoid overloading to ensure optimal operation and prevent wear.
- Inspect hoses for wear and replace if necessary to prevent damage.
By following these guidelines, you can delve into a proactive approach that ultimately safeguards your investment.
When to Call a Professional
In certain situations, it becomes essential to seek expert assistance when dealing with home appliances. Recognizing the signs that indicate a need for professional intervention can save time, money, and further complications. This section highlights key scenarios that warrant contacting a specialist.
| Situation | Reason to Call |
|---|---|
| Persistent leaks | Indicates potential damage to components or improper installation. |
| Unusual noises | Could signal internal issues that require specialized tools for diagnosis. |
| Frequent errors or malfunctions | Repeated issues may point to deeper mechanical or electronic failures. |
| Inability to start | May be related to electrical problems that need expert troubleshooting. |
| Unresolved odor | Indicates possible blockages or buildup that can affect appliance performance. |
Understanding these circumstances can help ensure that your appliance operates efficiently and safely, ultimately extending its lifespan and enhancing your home experience.
Parts Replacement Guide
When it comes to maintaining your home appliance, understanding the process of component substitution is crucial. This guide will provide you with the necessary steps to effectively change out various elements, ensuring optimal performance and longevity.
Identifying Faulty Components
Before proceeding with any substitutions, it’s essential to diagnose which part is malfunctioning. Common indicators include unusual noises, leaks, or failure to function. Careful observation and occasional testing can help pinpoint the issue, allowing for a more targeted approach to resolution.
Steps for Replacement
Once the problematic component is identified, follow these steps for successful substitution:
- Unplug the appliance to ensure safety during the process.
- Refer to your specific model’s guidelines for locating the part.
- Remove any necessary covers or panels to access the faulty component.
- Carefully detach the defective part, noting how it is connected.
- Install the new component, ensuring it is securely in place.
- Reassemble any covers or panels you removed earlier.
- Reconnect the power and test the appliance to confirm proper functionality.
By following these steps, you can ensure a smooth transition to new parts, enhancing the efficiency of your appliance.
Safety Precautions During Repair

Ensuring safety is paramount when addressing issues with household appliances. Proper precautions not only protect the individual performing the task but also safeguard the appliance itself. It is essential to be aware of potential hazards and take proactive steps to minimize risks during any maintenance or troubleshooting process.
| Precaution | Description |
|---|---|
| Power Disconnection | Always disconnect the power supply before starting any work to prevent electric shock. |
| Use Protective Gear | Wear safety goggles and gloves to protect against sharp edges and harmful substances. |
| Ventilation | Ensure adequate airflow in the workspace to avoid inhaling fumes from cleaning agents or materials. |
| Follow Instructions | Refer to the guidelines provided by the manufacturer to understand specific safety measures and protocols. |
| Keep Workspace Organized | A tidy work area reduces the risk of accidents and helps in maintaining focus during the task. |