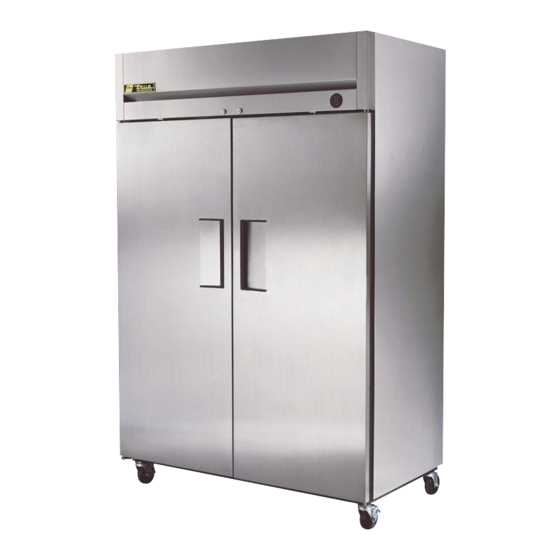
This section offers essential insights into maintaining and troubleshooting commercial cooling units, ensuring optimal performance and longevity. Proper care and attention to detail can significantly enhance the efficiency of these appliances, ultimately benefiting users through improved reliability and reduced downtime.
Understanding the common issues that may arise is crucial for anyone working with these types of equipment. With a focus on practical solutions and preventive measures, this guide empowers users to tackle challenges effectively. From identifying potential problems to implementing straightforward fixes, the information provided here is designed to support both novice and experienced technicians alike.
By familiarizing yourself with the intricacies of these cooling systems, you can ensure that they operate at their best. Knowledge of the components, operational principles, and maintenance techniques will facilitate swift resolution of any challenges, enabling you to maintain consistent and reliable performance throughout the appliance’s lifespan.
Understanding Common Freezer Issues
Maintaining optimal performance of cooling appliances is essential for preserving food quality and safety. Various complications may arise, leading to inefficiencies and potential food spoilage. Identifying these issues early can help in taking corrective measures to ensure proper functionality.
Frequent Problems Encountered
- Temperature Fluctuations: Inconsistent cooling can lead to spoilage. This may occur due to faulty thermostats or issues with the compressor.
- Excessive Frost Build-up: Over-accumulation of ice can obstruct airflow, affecting cooling efficiency. Common causes include blocked vents and faulty door seals.
- Strange Noises: Unusual sounds may indicate mechanical problems, such as a malfunctioning motor or worn-out parts.
Signs of Malfunction
- Increased Energy Bills: Higher than normal energy costs can suggest that the appliance is working harder than it should.
- Condensation or Water Leaks: Accumulation of moisture can point to seal issues or improper temperature settings.
- Foul Odors: Bad smells may signal spoiled food or the need for a thorough cleaning.
Identifying Temperature Problems
When a chilling appliance fails to maintain the desired environment, it can lead to various issues. Recognizing these temperature-related challenges is crucial for restoring functionality and ensuring that items are preserved adequately. This section explores common indicators of thermal irregularities and provides guidance on how to address them effectively.
Common Symptoms of Temperature Issues
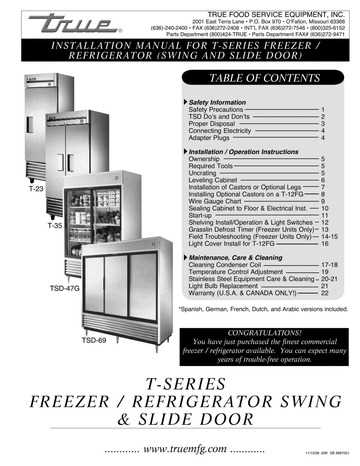
Several signs may suggest that the cooling unit is not operating as it should. Inconsistent internal temperatures can be a primary indicator, manifesting as freezing or thawing of products that should remain stable. Additionally, the presence of frost buildup inside or on the appliance’s components can point to airflow blockages or malfunctioning parts.
Initial Troubleshooting Steps
To diagnose potential problems, begin by checking the temperature settings and verifying that they are within the recommended range. If the appliance has a digital display, ensure it accurately reflects the current conditions. Regular maintenance is also vital; cleaning the condenser coils and ensuring proper ventilation can prevent many common thermal issues from arising. If problems persist, further investigation may be necessary to identify underlying causes.
Inspecting Seals and Gaskets
Ensuring the integrity of the sealing components is crucial for optimal performance. These elements play a vital role in maintaining a controlled environment, preventing unwanted air infiltration and moisture buildup. Regular assessment helps identify wear or damage that could compromise efficiency.
Begin by visually examining the perimeter of the sealing surfaces. Look for signs of cracks, tears, or warping that might hinder proper closure. Gently press along the edges to check for any irregularities or gaps. A tight seal should feel consistent and secure.
Next, utilize a damp cloth to wipe the surfaces clean. This not only removes debris but also allows for a clearer view of any imperfections. If there are persistent issues, consider applying a small amount of food-safe lubricant to enhance flexibility and restore some original elasticity.
Finally, monitor the temperature within the storage unit after reassembly. If the temperature fluctuates significantly, it may indicate that the sealing components require replacement or further adjustment. Regular maintenance of these crucial parts will help ensure longevity and efficient operation.
Diagnosing Electrical Failures
Identifying issues related to electrical systems is crucial for restoring optimal performance in cooling appliances. Understanding the common signs of malfunction can streamline troubleshooting and facilitate timely interventions.
Common Symptoms of Electrical Issues
- Inconsistent temperature control
- Unusual noises during operation
- Failure to power on
- Frequent tripping of circuit breakers
Step-by-Step Diagnosis
- Inspect the power source for any visible damage or loose connections.
- Check the main control panel for signs of malfunction, such as burnt components.
- Test the electrical components using a multimeter to measure voltage and resistance.
- Evaluate wiring integrity for any signs of wear or corrosion.
By systematically examining these areas, one can effectively pinpoint electrical failures and take appropriate corrective measures. Keeping a detailed log of findings can also assist in future diagnostics and repairs.
Maintaining Optimal Airflow
Ensuring efficient circulation of air within a chilling appliance is crucial for its performance and longevity. Proper airflow facilitates even cooling and helps maintain the desired temperature, preventing potential issues that may arise from inadequate ventilation.
Regular Inspection: Frequent checks of the air vents are essential. Make sure they are not obstructed by any items, allowing free passage of air. This will promote uniform temperature distribution throughout the unit.
Cleaning Components: Dust and debris can accumulate on the coils and filters, hindering airflow. Routine cleaning of these components is necessary to maintain optimal functionality. Use a soft brush or cloth to gently remove any buildup.
Adjusting Shelves: Arranging items thoughtfully within the storage space can enhance airflow. Avoid overcrowding and ensure that there is sufficient space between items to allow air to circulate freely.
Monitoring Temperature: Keep an eye on the internal temperature using a reliable thermometer. If the temperature fluctuates frequently, it may indicate airflow issues that need to be addressed promptly.
Cleaning the Condenser Coils
Maintaining the efficiency of cooling appliances is essential for optimal performance. One critical aspect of this upkeep involves the regular cleaning of the coils located at the back or beneath the unit. Dust and debris accumulation on these components can hinder heat exchange, leading to increased energy consumption and reduced cooling effectiveness.
Importance of Regular Maintenance
Ensuring that these coils remain clean significantly contributes to the longevity of the appliance. A well-maintained system not only operates more efficiently but also helps prevent potential breakdowns. By dedicating a little time to this task, users can enhance performance and save on energy costs.
Steps for Effective Cleaning
Begin by unplugging the appliance to ensure safety. Use a vacuum cleaner with a brush attachment to gently remove dust and dirt from the coils. For stubborn grime, a soft brush can be utilized to avoid damaging the surface. After cleaning, reconnect the unit and monitor its operation. Regular checks every few months will help maintain peak efficiency.
Checking the Drainage System
Ensuring the proper functioning of the drainage pathway is crucial for maintaining optimal performance. A well-maintained system prevents excess moisture buildup, which can lead to inefficiencies and potential issues. This section focuses on how to assess and maintain the drainage components effectively.
Inspecting for Blockages
Begin by examining the drainage channel for any obstructions that could impede water flow. Common culprits include debris, ice buildup, or foreign objects. Follow these steps to conduct a thorough check:
- Remove any visible debris from the channel.
- Use warm water to dissolve minor ice formations.
- Check for any foreign objects that may have fallen into the drain.
Testing Water Flow
After clearing the area, it’s essential to ensure that water can flow freely through the system. You can perform the following test:
- Pour a small amount of warm water into the drainage opening.
- Observe if the water drains quickly and without obstruction.
- If water remains stagnant, additional clearing may be necessary.
Regular checks of the drainage setup will help maintain optimal conditions and extend the lifespan of the unit.
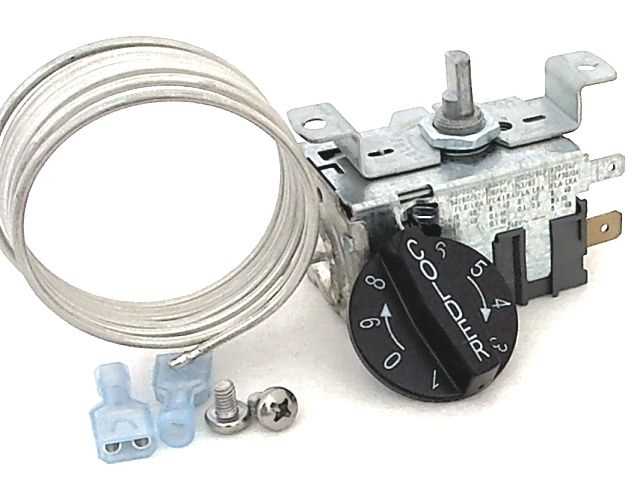
Repairing the Thermostat Settings
Adjusting the temperature regulation system is crucial for maintaining optimal performance of cooling appliances. Proper calibration ensures that the internal environment remains conducive for preserving items effectively. Understanding how to manage these settings can enhance efficiency and prolong the lifespan of the unit.
Identifying Issues with Temperature Control
Before making any adjustments, it’s essential to diagnose potential problems with the temperature control. Common symptoms indicating a need for recalibration include:
- Inconsistent internal temperatures.
- Frost buildup on components.
- Unusual noises indicating component malfunction.
Steps to Adjust the Settings
Once issues are identified, follow these steps to calibrate the temperature regulation:
- Unplug the appliance to ensure safety.
- Locate the temperature adjustment mechanism, usually found inside the unit.
- Use a calibrated thermometer to monitor the current internal temperature.
- Adjust the settings gradually, allowing time for the temperature to stabilize between changes.
- Once set, plug the unit back in and monitor its performance over the next few days.
By regularly maintaining and adjusting the temperature settings, you can ensure optimal functionality and longevity of your cooling appliance.
Recognizing Frost Build-Up Causes
Frost accumulation can significantly affect the efficiency of cold storage units. Understanding the underlying reasons for this issue is essential for maintaining optimal performance and prolonging the lifespan of the appliance. Several factors contribute to frost formation, and identifying them can help in preventing future occurrences.
One common cause is poor door sealing. If the door gaskets are damaged or not functioning properly, warm air can enter the unit, leading to condensation and subsequent frost formation. Regularly inspecting the seals for any wear or gaps is crucial.
Another factor involves excessive moisture. This can result from storing uncovered food items or frequent door openings. Keeping food covered and minimizing the frequency of door openings can significantly reduce humidity levels inside.
Inadequate airflow is also a contributor. Obstructed vents or overloading the unit with items can hinder air circulation, causing localized frost build-up. Ensuring that air can circulate freely within the space is vital for maintaining even temperatures.
Finally, malfunctioning components, such as the defrost timer or thermostat, may lead to improper temperature regulation. Regular maintenance and prompt repairs of these parts can prevent frost from forming and maintain optimal functionality.
Understanding Compressor Functionality
The compressor serves as the heart of refrigeration systems, playing a vital role in maintaining the desired temperature within an enclosed space. Its primary function revolves around compressing refrigerant gas, allowing it to circulate through the system efficiently and effectively. By transforming low-pressure gas into high-pressure vapor, the compressor ensures that cooling takes place consistently and reliably.
How the Compressor Operates
At its core, the compressor draws in refrigerant from the evaporator coil, where it has absorbed heat. This gas is then compressed, raising its pressure and temperature. Following this, the high-pressure vapor moves to the condenser coils, where it releases heat and condenses into a liquid. This cycle is essential for creating the cooling effect that keeps the interior environment at optimal temperatures.
Importance of Maintenance
Regular maintenance of the compressor is crucial for the longevity and efficiency of the entire system. Neglecting this component can lead to various issues, such as reduced cooling capacity and increased energy consumption. Ensuring that the compressor is clean and free from obstructions can significantly enhance its performance and extend its lifespan.
Replacing Worn Out Parts
Over time, components within your appliance can experience wear and tear, leading to decreased efficiency and functionality. Addressing these issues promptly can restore performance and extend the lifespan of the unit. Understanding which elements require replacement and how to carry out the process is crucial for optimal operation.
Identifying Affected Components
Recognizing which parts are worn out is essential for effective maintenance. Common indicators include:
- Unusual noises during operation
- Inconsistent temperature control
- Visible damage or deterioration
- Increased energy consumption
Steps for Replacement
Once you have identified the faulty components, follow these steps for replacement:
- Ensure the unit is unplugged to prevent electrical hazards.
- Carefully remove any panels or covers to access the parts.
- Take note of how the old components are connected for proper installation of the new ones.
- Replace the worn parts with high-quality alternatives to ensure longevity.
- Reassemble the unit, ensuring all connections are secure.
- Plug the appliance back in and monitor its performance to confirm the effectiveness of the replacement.
Utilizing Repair Tools Effectively
Mastering the art of appliance restoration involves more than just basic knowledge; it requires a strategic approach to using various instruments at your disposal. The ability to select and wield the right tools significantly enhances efficiency and accuracy during the fixing process. Understanding how each device functions and its purpose can lead to successful outcomes in troubleshooting and resolving issues.
Choosing the Right Instruments
Identifying suitable instruments for specific tasks is crucial. For instance, utilizing precision screwdrivers allows for easy access to tight spaces, while pliers can aid in manipulating wires or components. Investing in high-quality equipment ensures durability and reliability, making repairs more manageable and effective.
Maintenance of Tools
Regular maintenance of your equipment is essential for optimal performance. Cleaning and storing tools properly can prevent wear and tear, ensuring they remain in peak condition for future tasks. Routine checks for functionality and calibration are also important, as they contribute to achieving precise results during restoration efforts.
Preventive Maintenance Tips
Maintaining optimal performance of your cooling unit is essential for ensuring longevity and efficiency. Regular upkeep not only helps in identifying potential issues before they escalate but also enhances energy efficiency, ultimately leading to cost savings.
Regular Cleaning
Keeping the interior and exterior of the unit clean is crucial. Accumulation of dust and debris can obstruct airflow and hinder performance. Wipe down surfaces with a mild cleaner, and ensure that ventilation areas are free from obstructions. Cleaning condenser coils at least twice a year can also improve efficiency.
Check Temperature Settings
Regularly monitoring temperature settings ensures that your equipment operates within the ideal range. A temperature that is too low can lead to unnecessary energy consumption, while a higher setting may compromise food safety. Use a reliable thermometer to verify that the temperatures are consistent and within the recommended limits.